An Azure Bastion host provides secure RDP and SSH connections to your Azure VMs. You connect to your VMs directly in the Azure portal over TLS. You do not have to assign public IP addresses to your VMs. In this post, you will learn how to create an Azure Bastion host and connect to your Azure VMs through the Azure portal.
Key Features
- Azure Bastion hosts are deployed per virtual network
- Once deployed, an Azure Bastion host provides secure access to all VMs in the same virtual network
- No Public IPs required for your Azure VMs
- Azure Bastion is a fully managed PaaS, hardened internally
- NSGs for virtual subnets can be configured to only allow connections from Azure Bastion
Prerequisites
An Azure Bastion requires a dedicated subnet in the virtual network you are deploying the Bastion host to. The subnet must be named AzureBastionSubnet and be at least /27 or larger. You can create this subnet ahead of time or create it during the Bastion host deployment.
Create a Bastion Host using the Azure Portal
- Log in to the Azure portal
- From the Azure portal menu, choose Create a resource
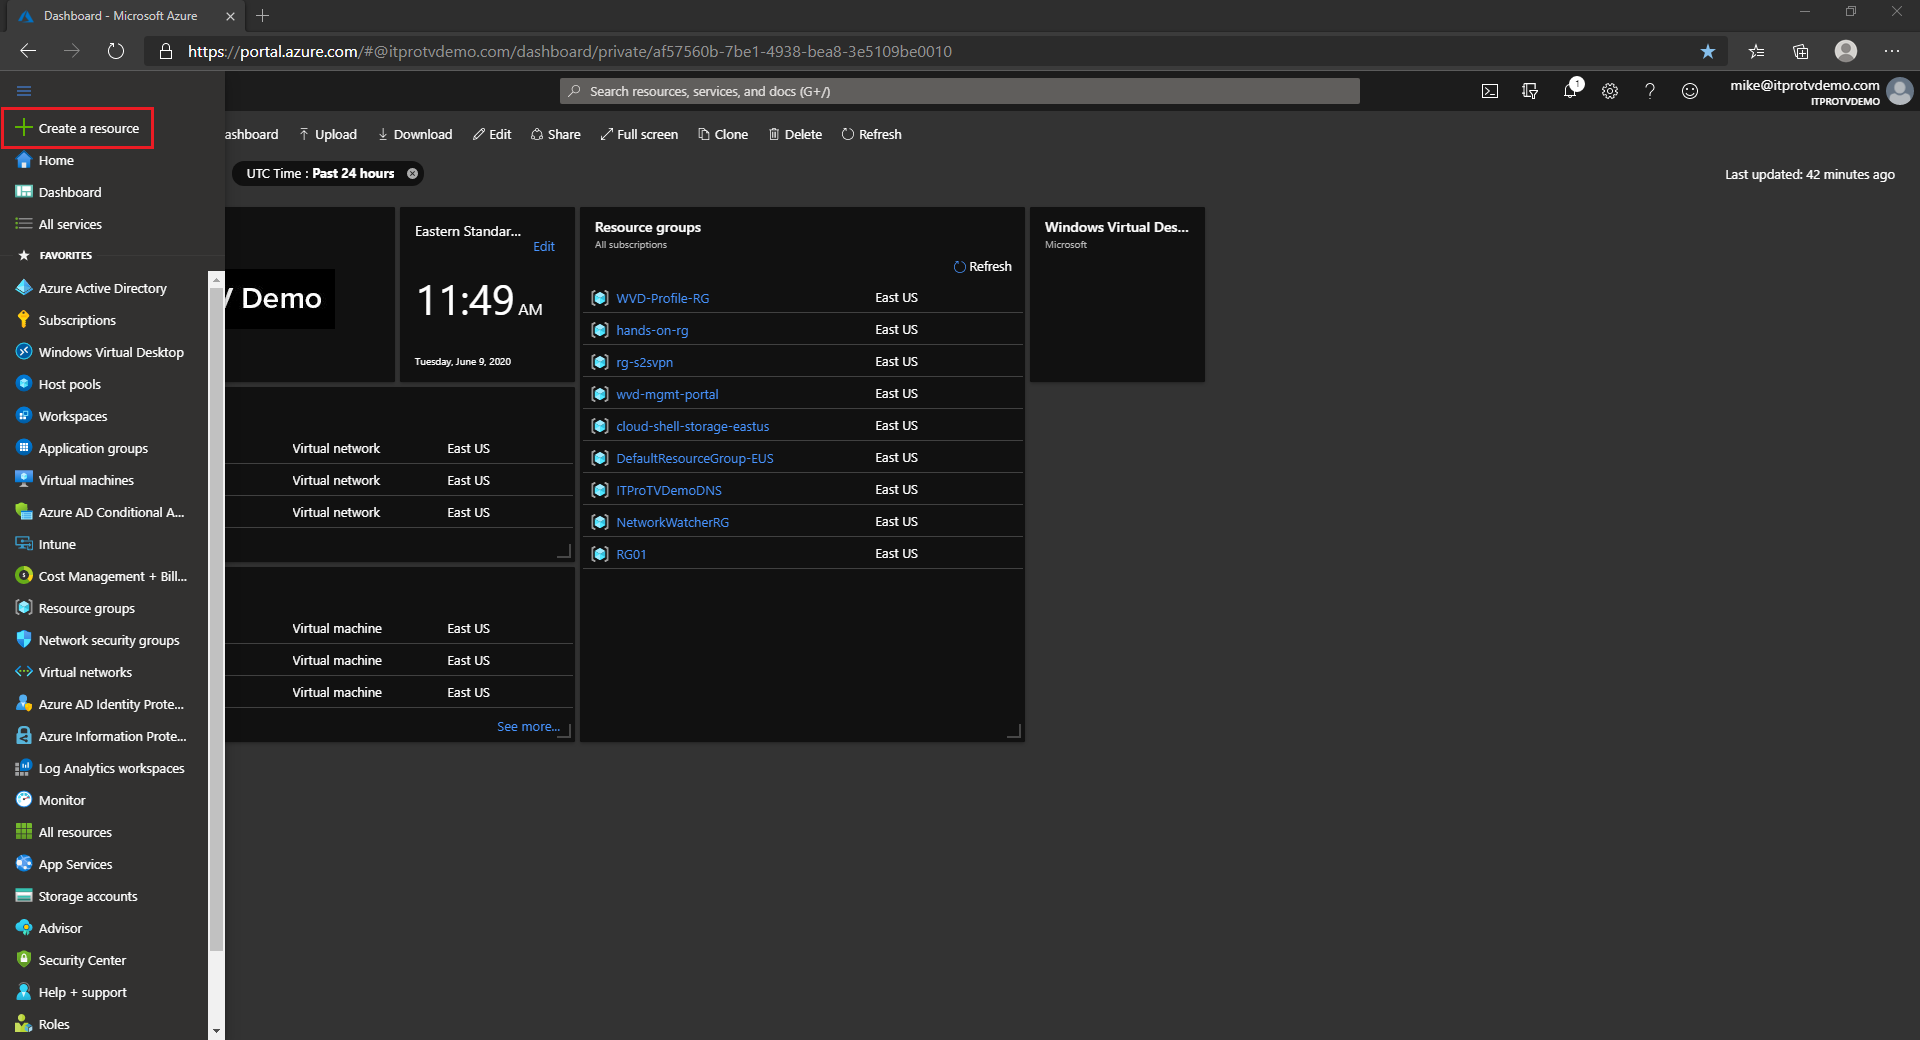
- Search the Marketplace for bastion and click Enter
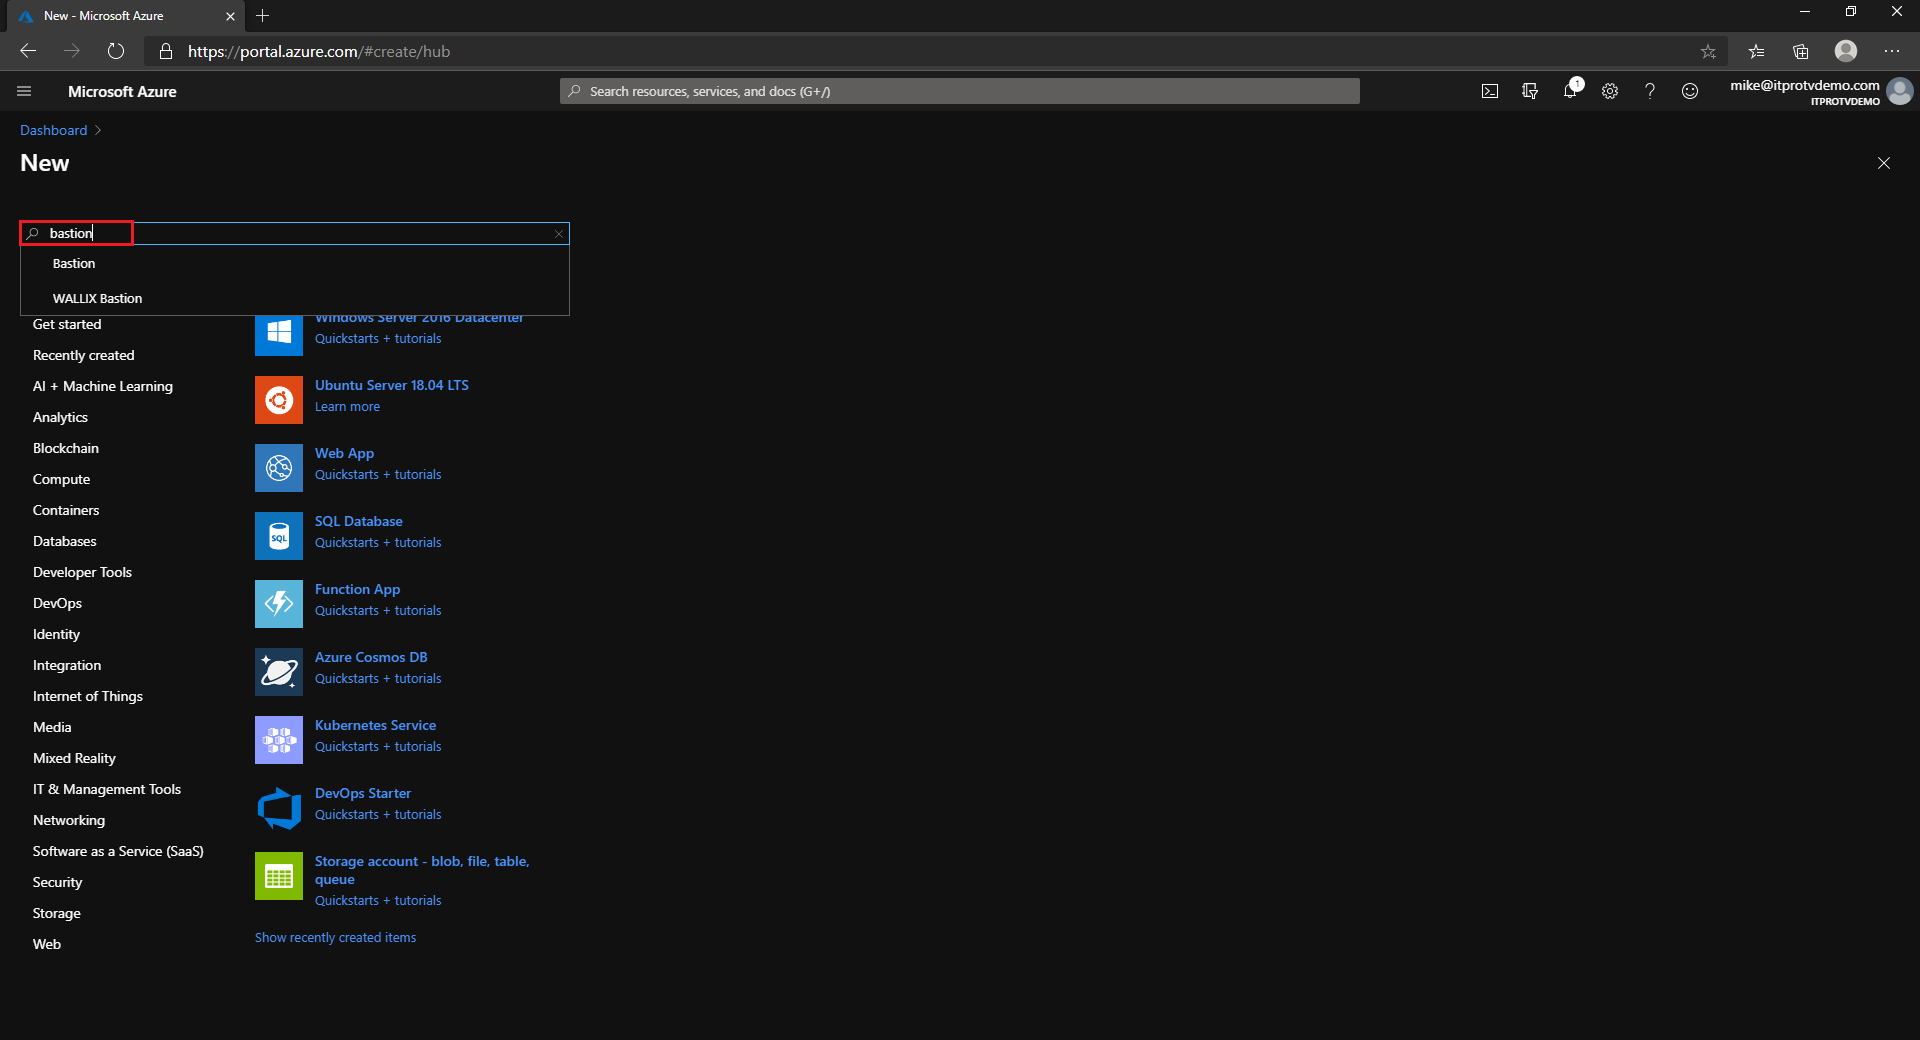
- In the search results, select Bastion published by Microsoft
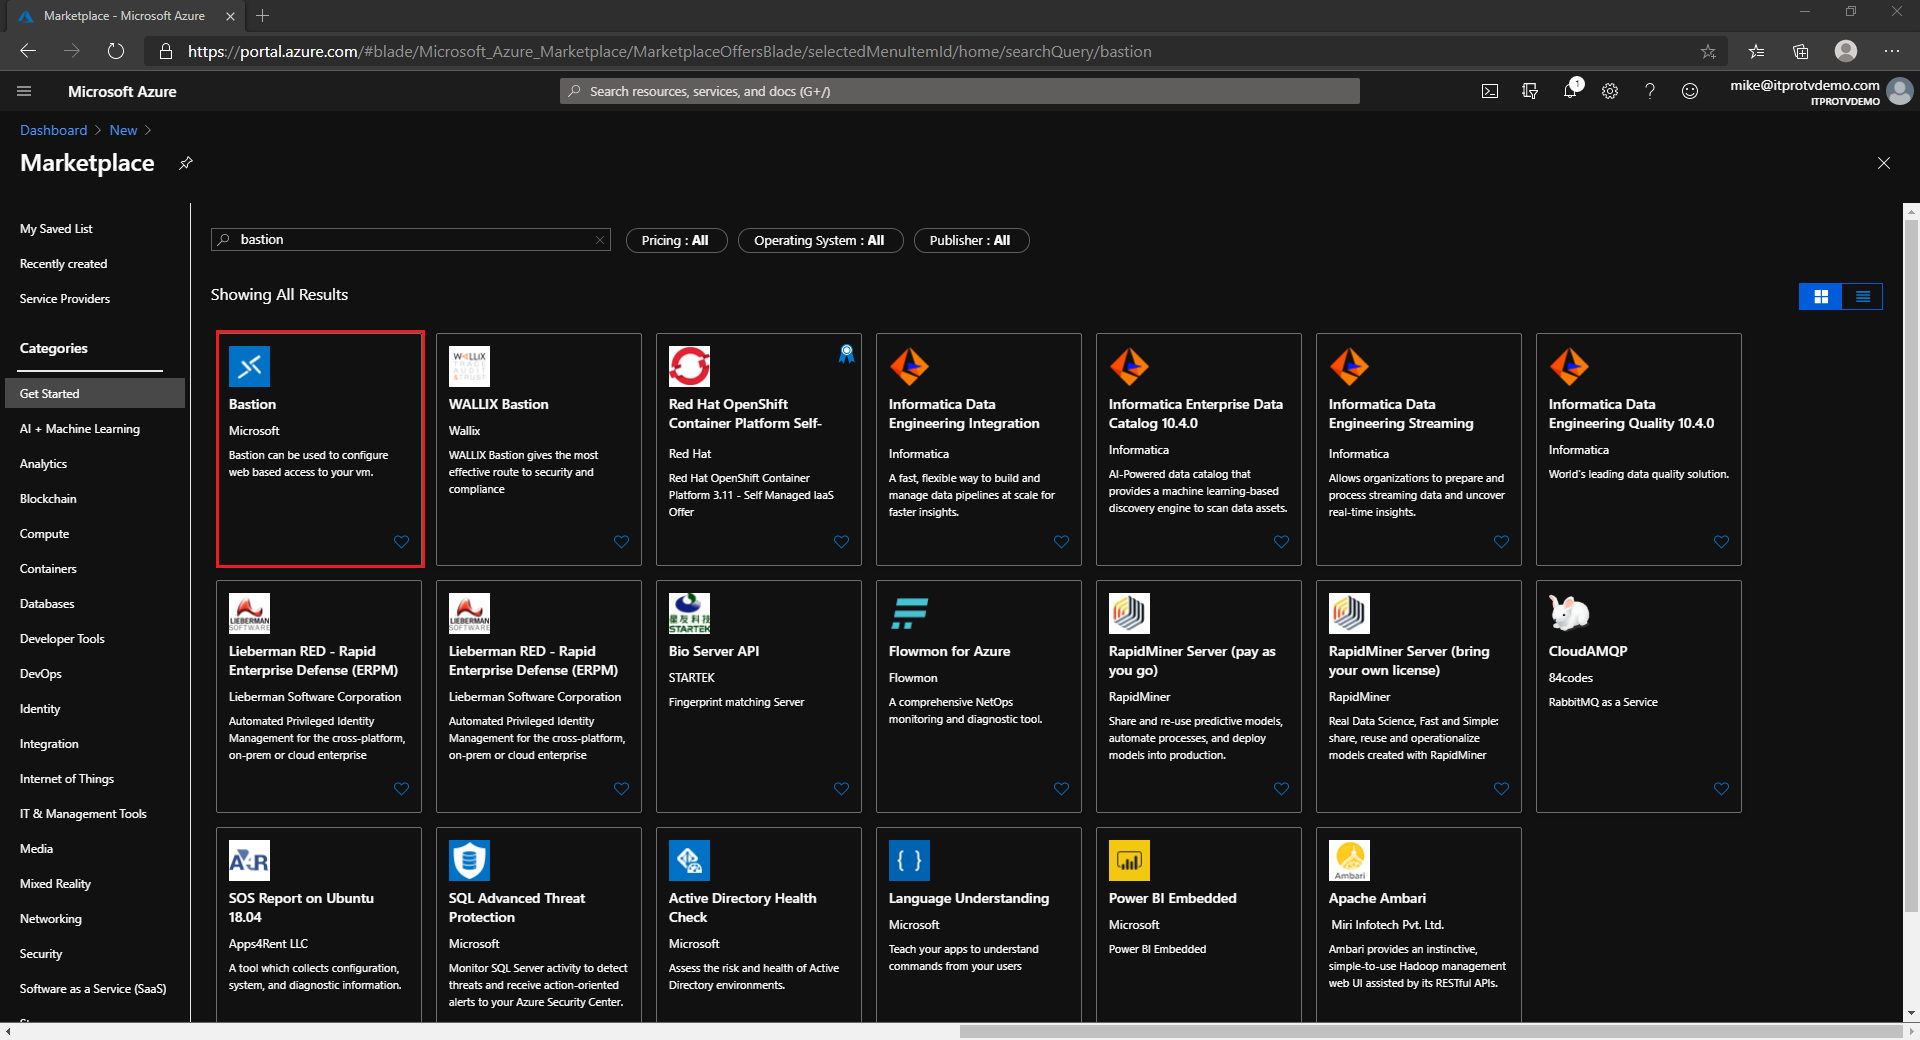
- Click Create
- Specify the configuration settings for your Bastion resource
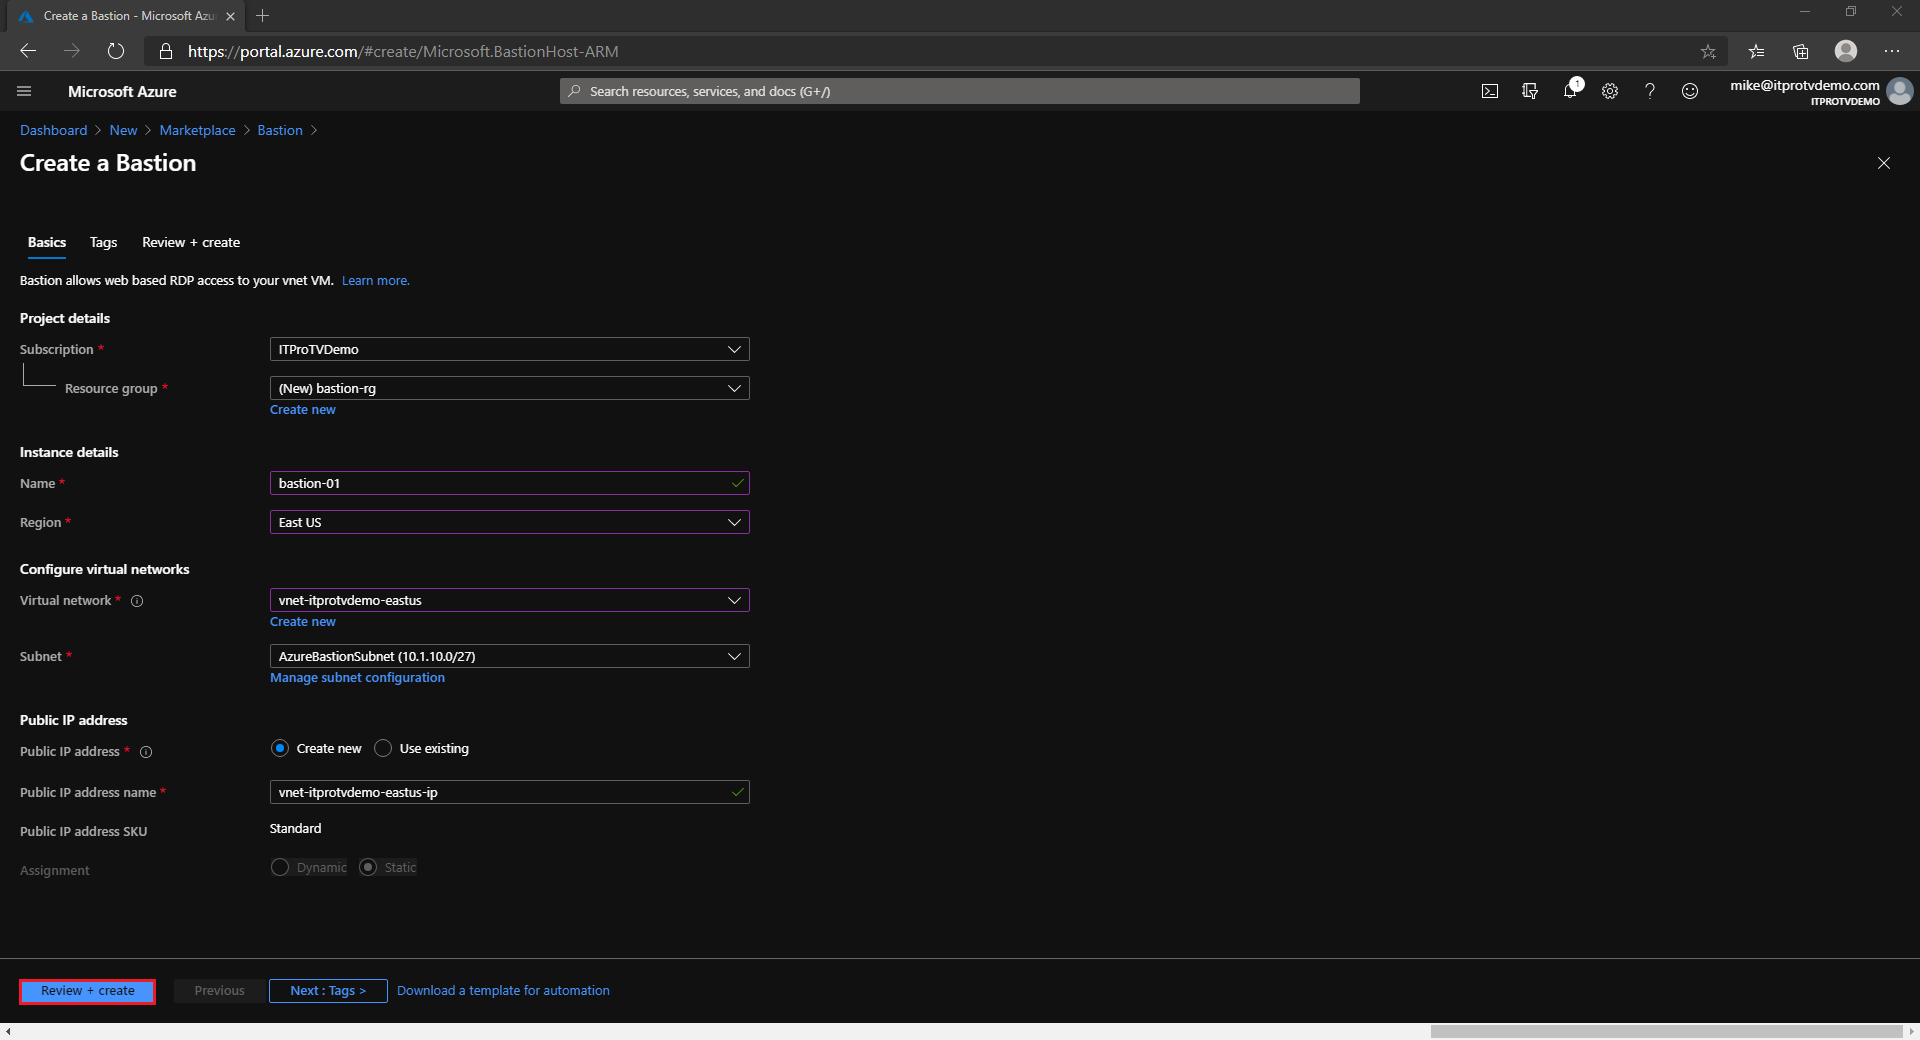
- Subscription: Select your Azure subscription that you are creating the Bastion resource in.
- Resource Group: Select an existing resource group or create a new resource group to create the Bastion resource in.
- Name: Enter a name for the Bastion resource.
- Region: Select the region to create the Bastion resource in.
- Virtual Network: Select and existing or create a new virtual network to create the Bastion resource. An existing network will require address space for the Azure Bastion subnet.
- Subnet: Select or create the subnet for the Bastion resource. It must be named AzureBastionSubnet and be at least /27 or larger.
- Public IP address: Create a new or select an existing public IP address that will be used to connect to the Bastion resource. The public IP address must be in the same region as the Bastion resource.
- Public IP address name: Enter a name for the public IP address.
- Public IP address SKU: Only Standard is available for a Bastion resource.
- Assignment: Only Static is available for a Bastion resource.
- Click Review + Create
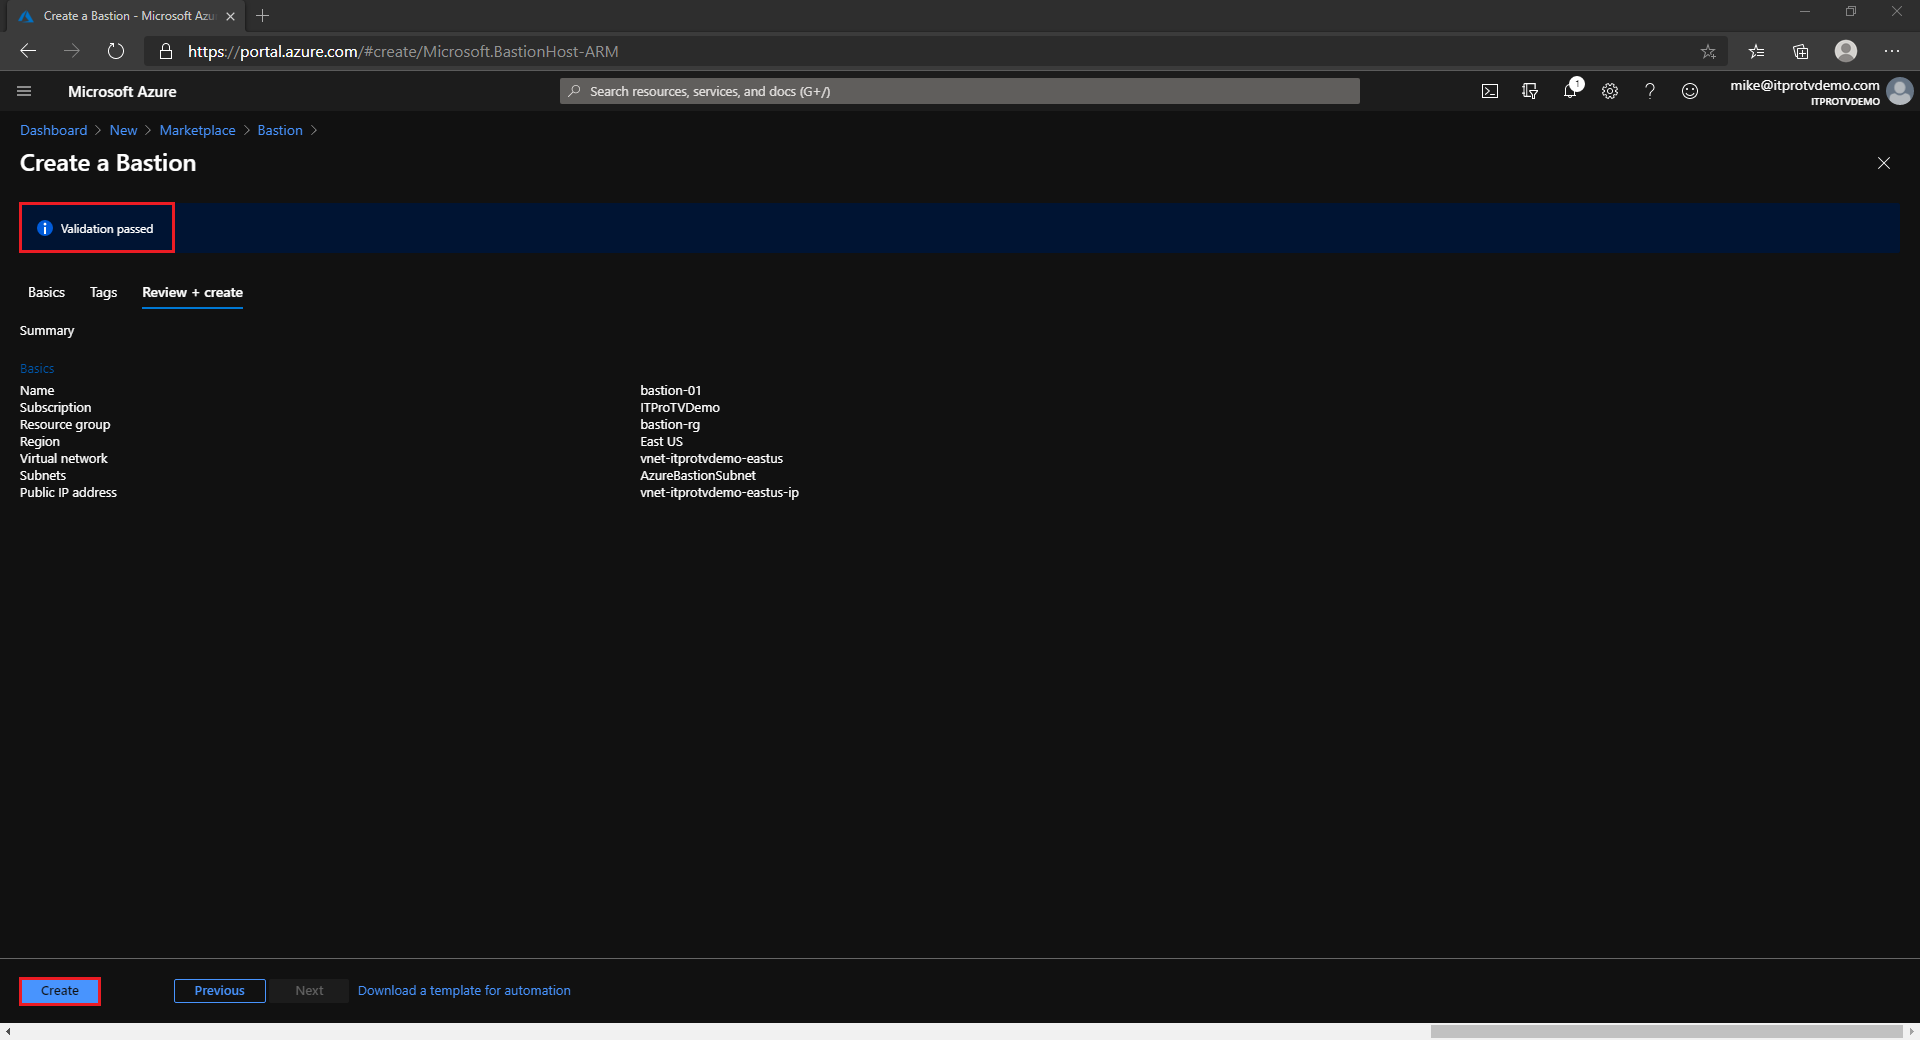
- Once validation succeeds, select Create
Create a Network Security Group
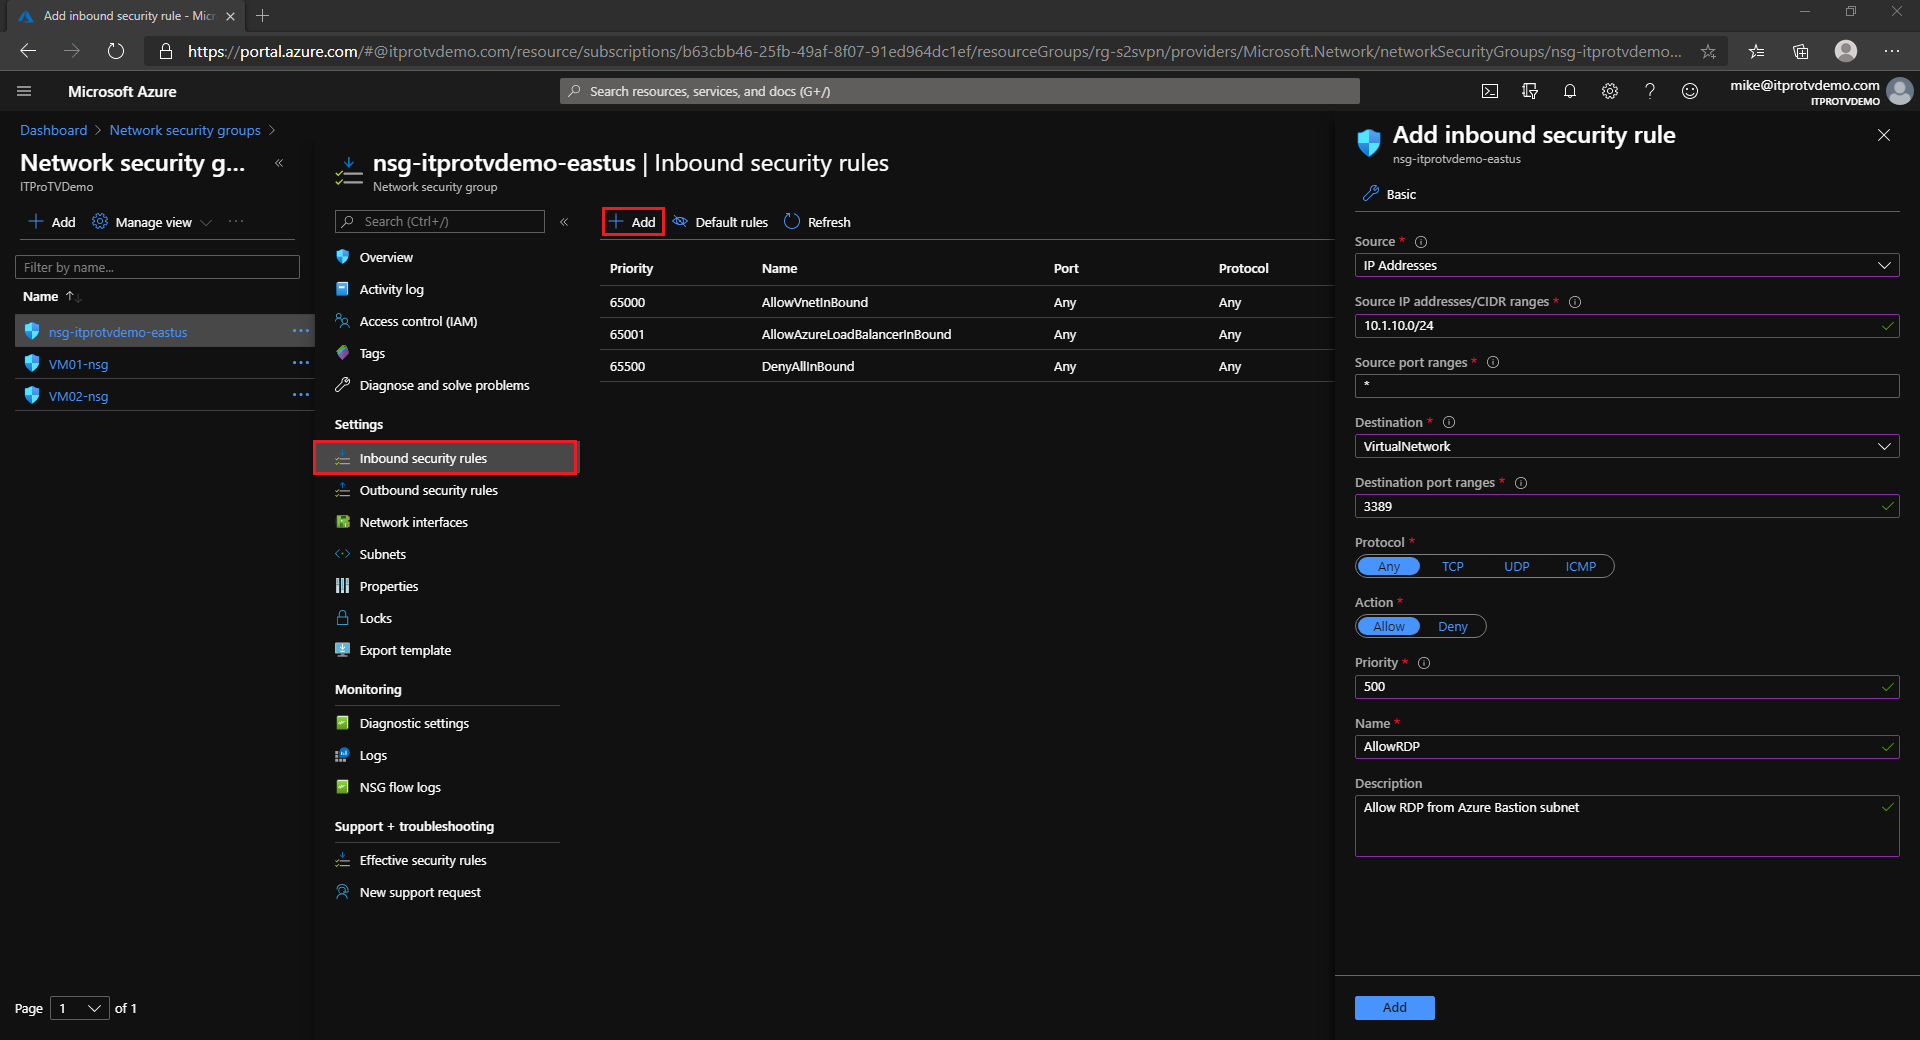
The Azure Bastion is a fully managed PaaS service from Azure. It is hardened internally to provide you secure RDP/SSH connectivity. You do not need to apply any NSGs on Azure Bastion subnet. For the subnets that the Azure Bastion will connect to, configure NSGs to allow RDP/SSH connections from the Azure Bastion subnet only.
You can create a new NSG for your VM subnets, or you can modify an existing NSG. Create an inbound security rule that specifies the source as the Azure Bastion subnet IP range and the destination ports 3389/22 for RDP/SSH, respectively.
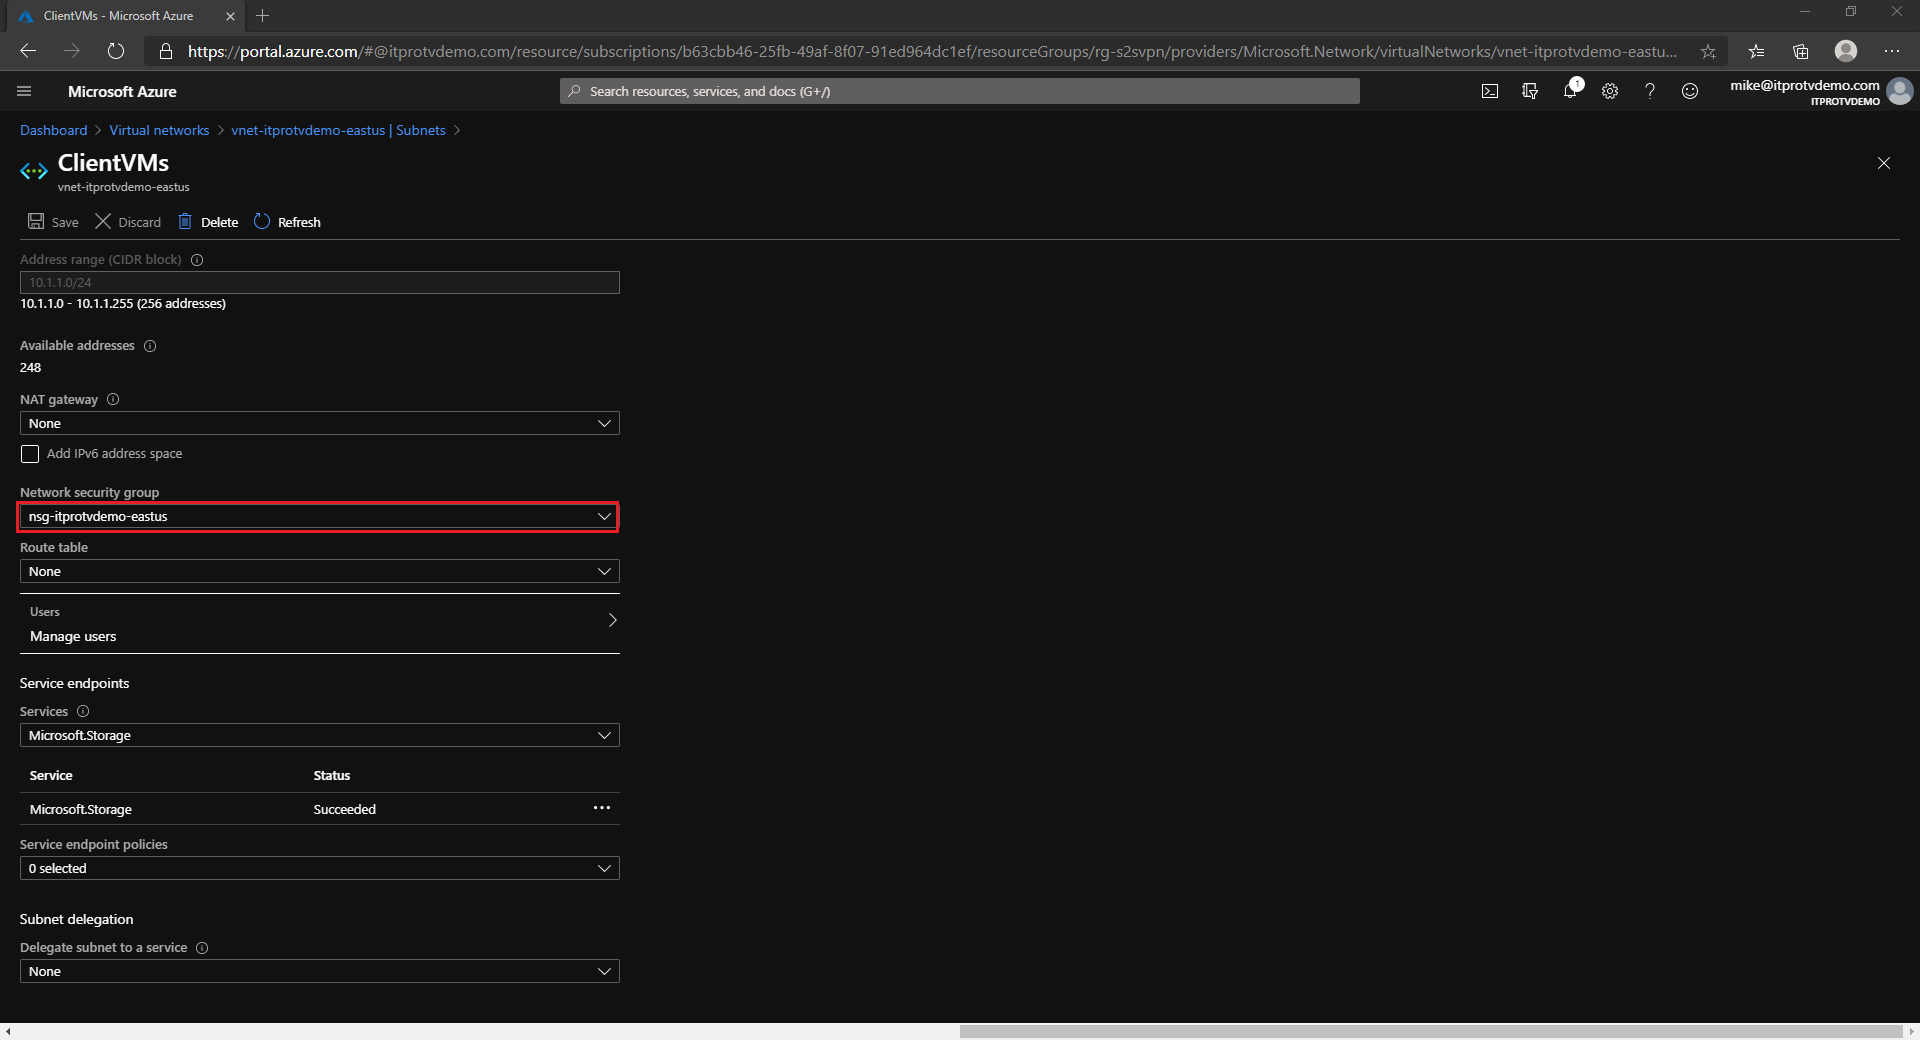
Update the VM subnet to use the new or updated NSG.
Connect to an Azure VM using Azure Bastion
Now that you have created an Azure Bastion host and configured the NSG to allow RDP from the Azure Bastion host, you can connect to any VM in the virtual network.
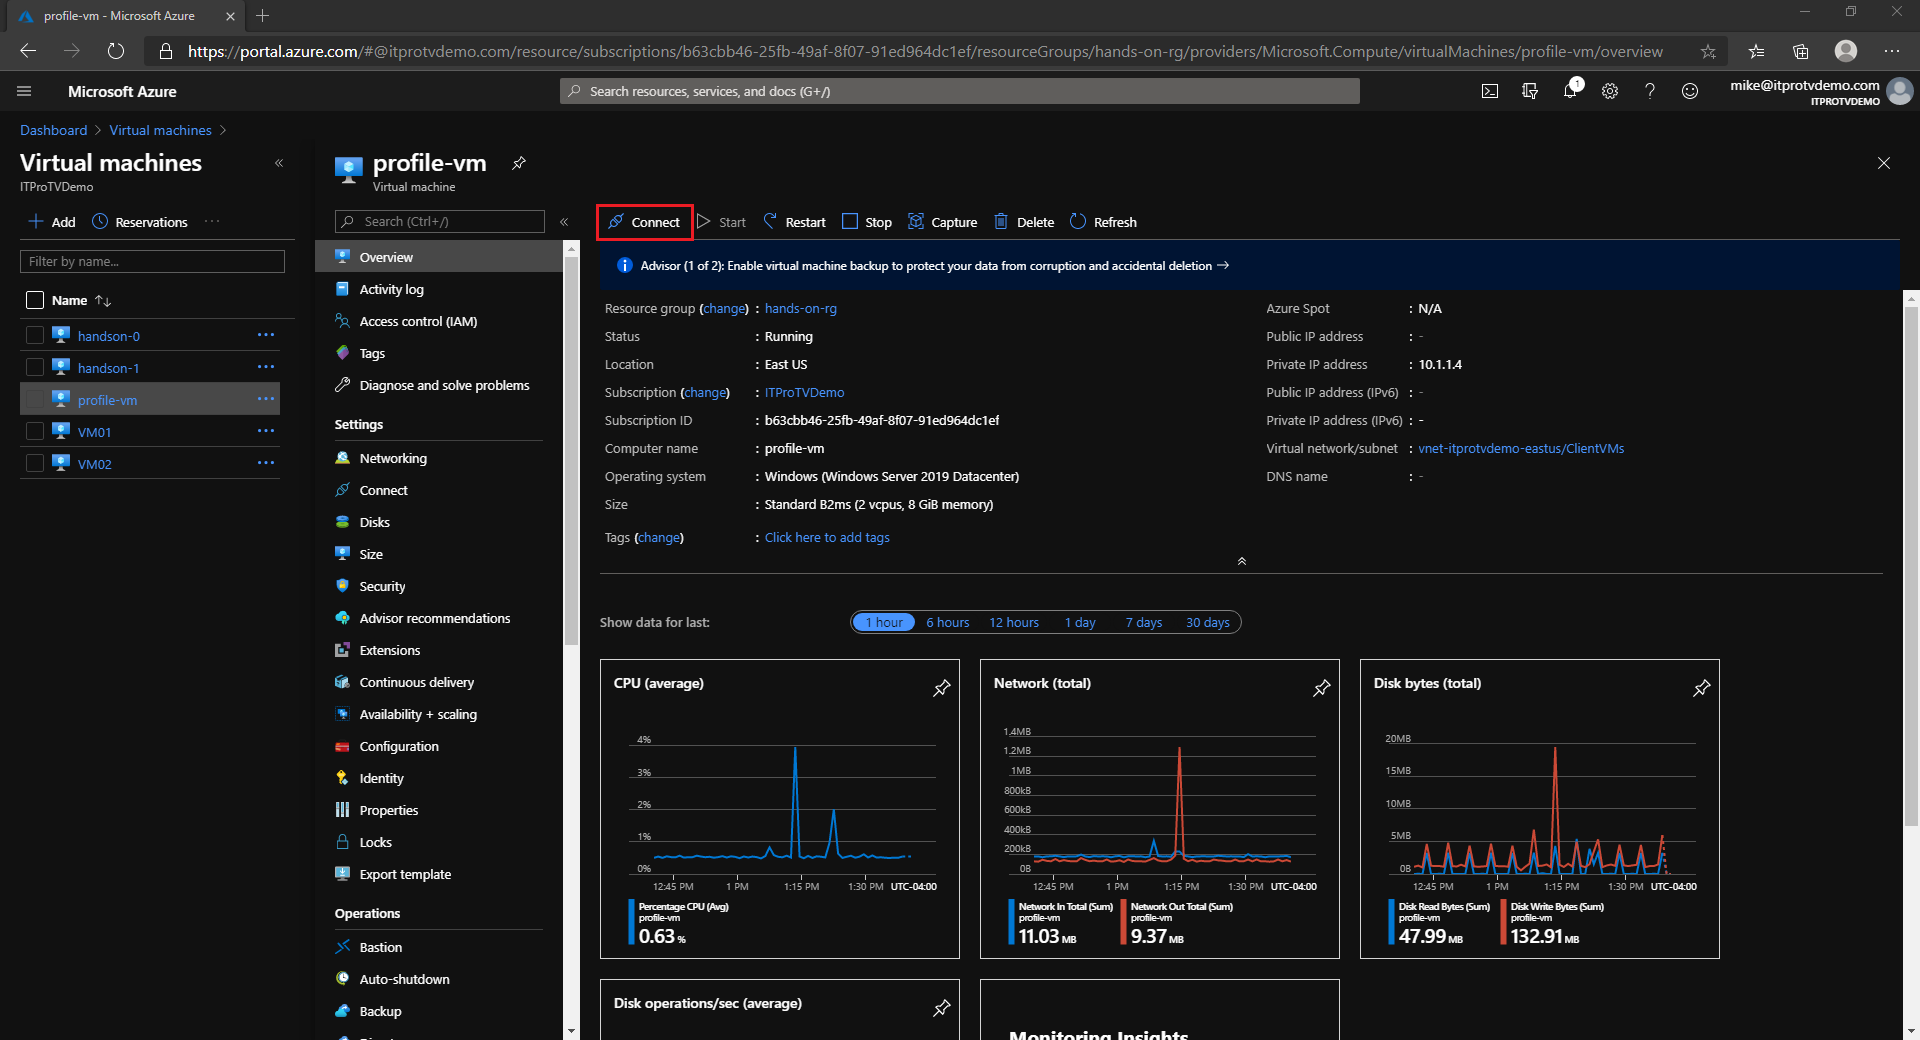
- In the Azure portal, navigate to the VM you want to connect to
- Click Connect and choose Bastion
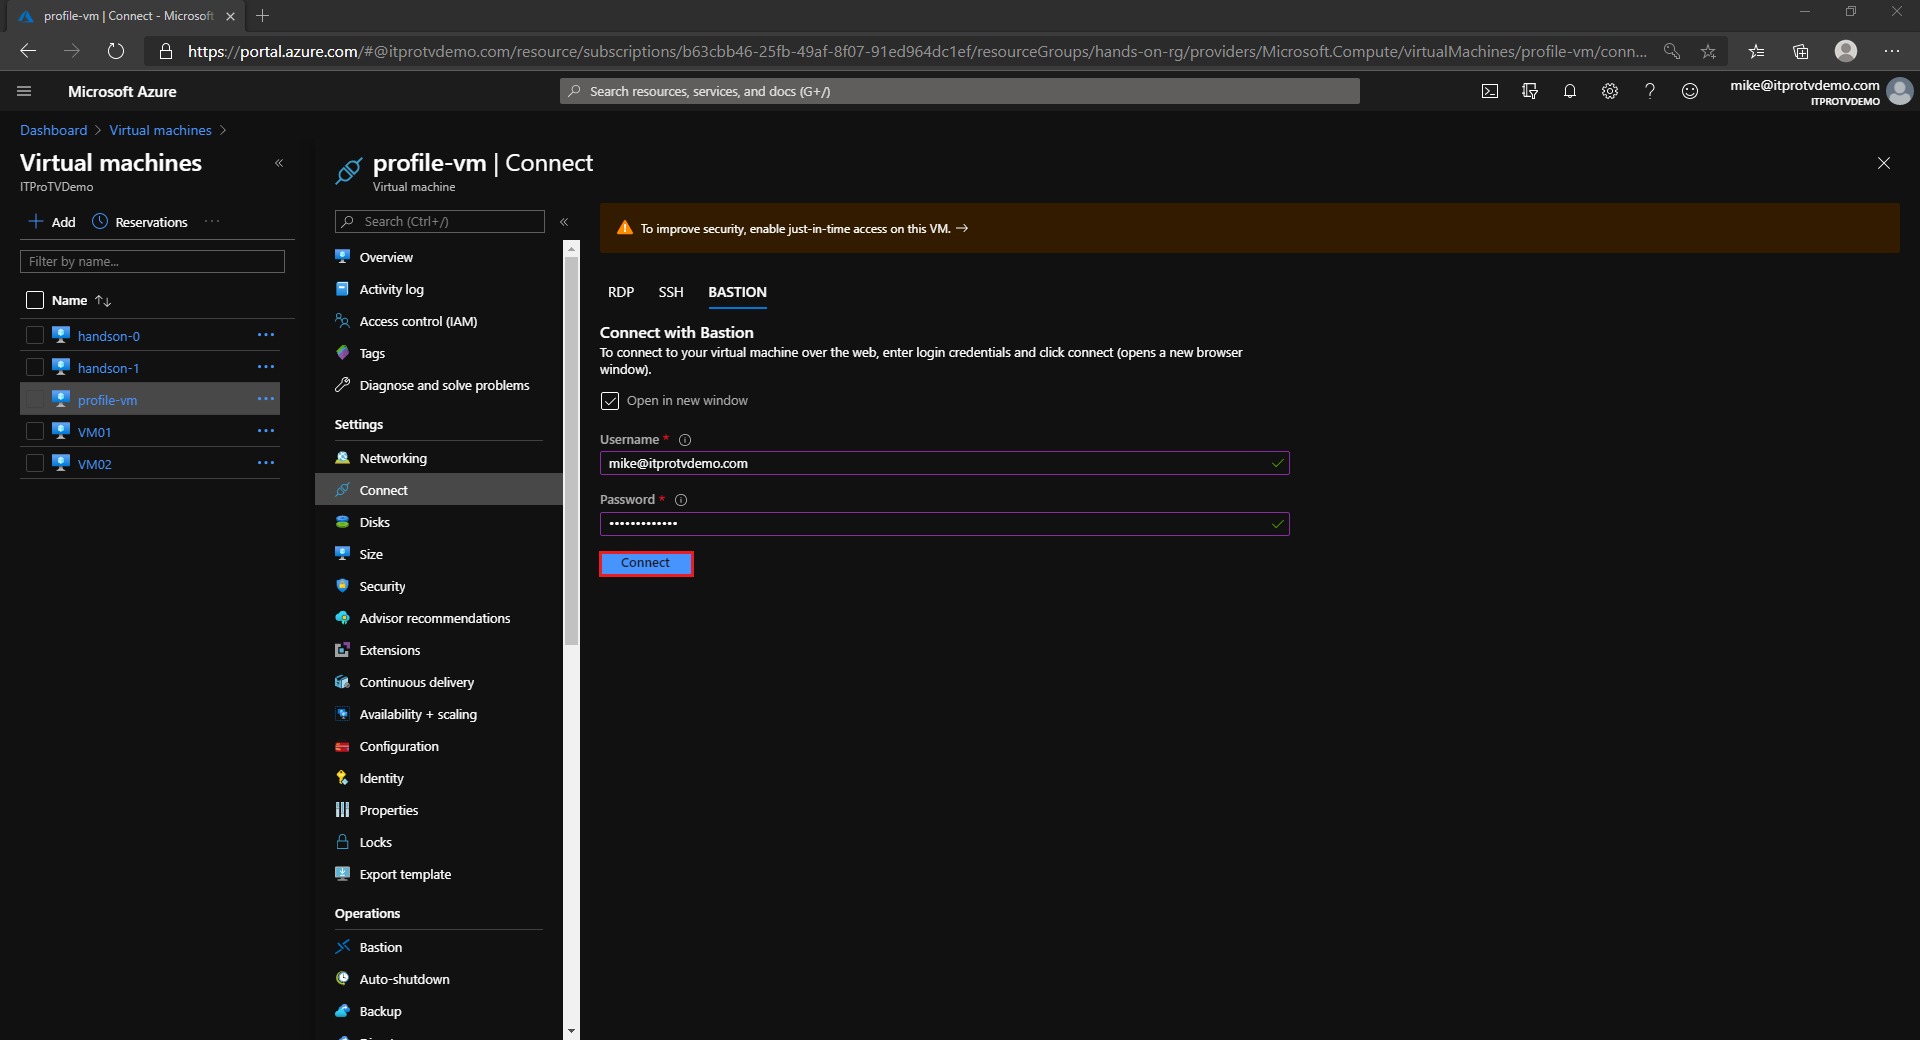
- Provide credentials to connect to the VM
- Click Connect
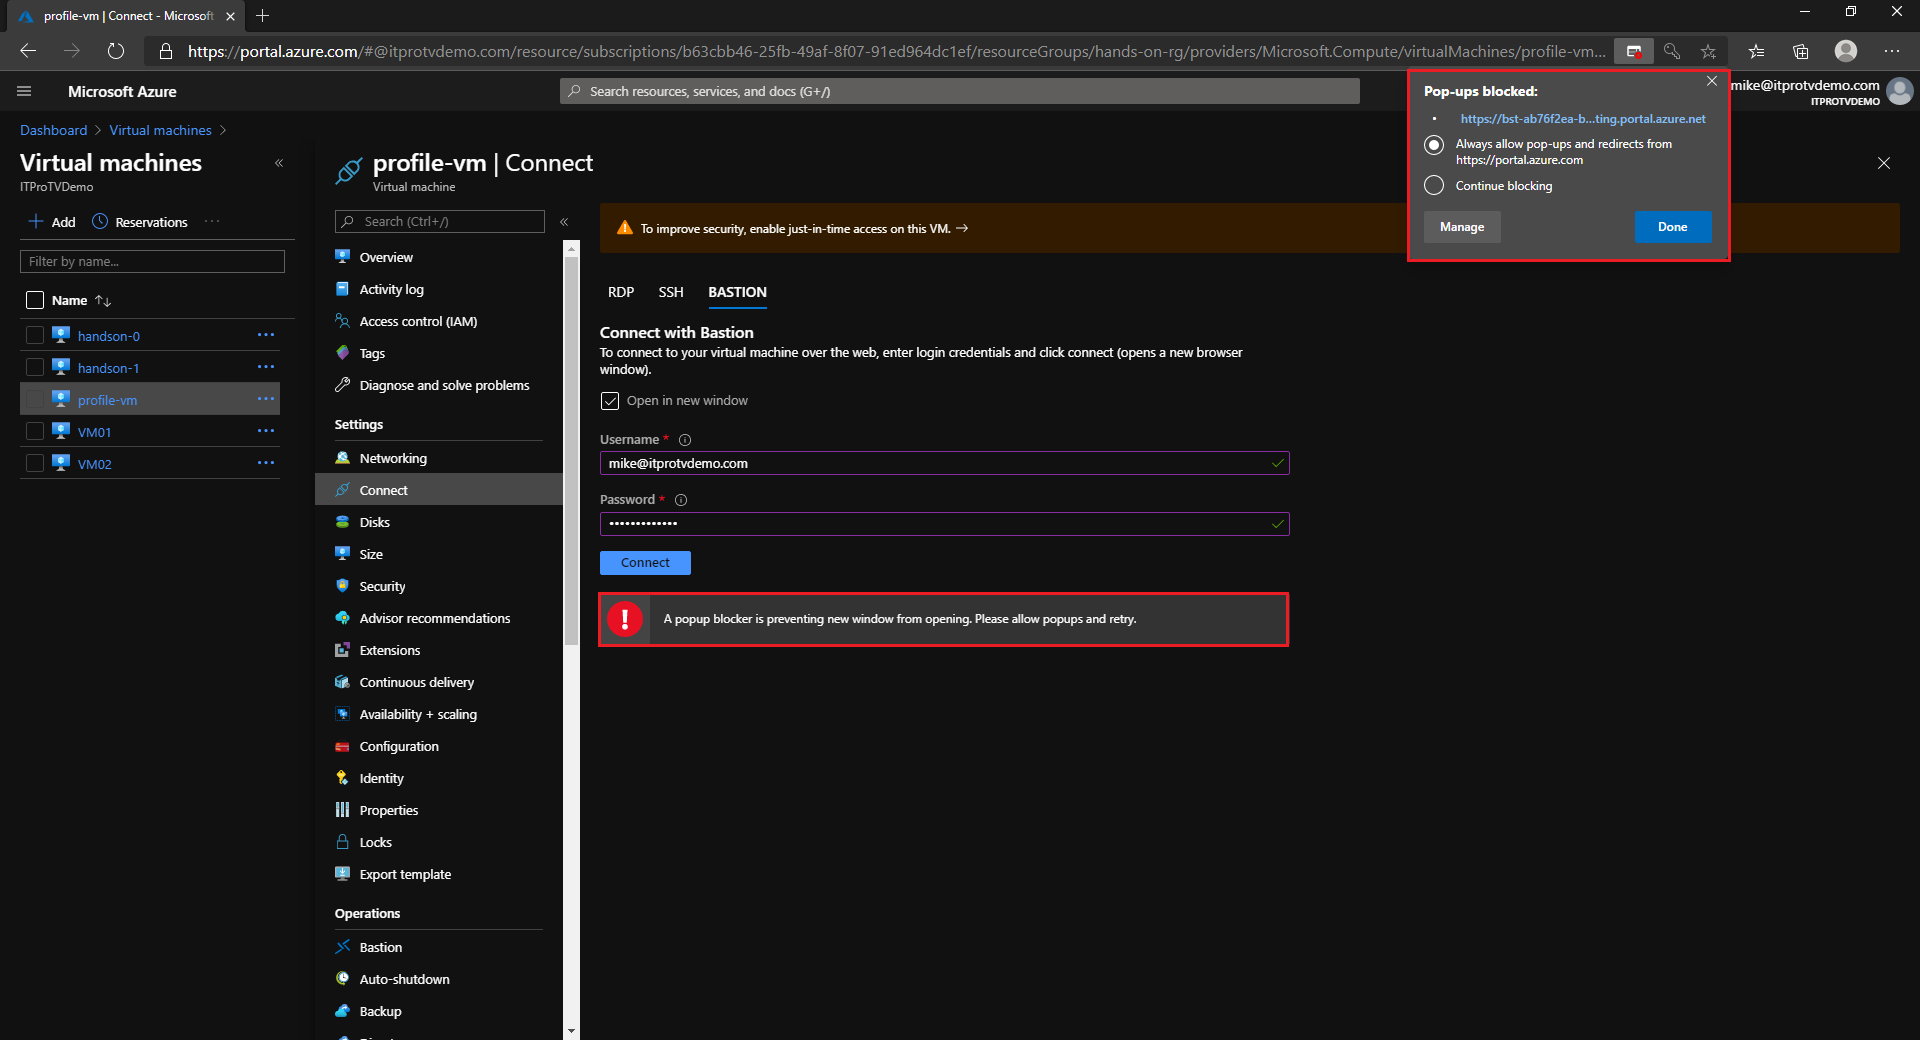
By default, the RDP session opens in a new window. You will need to allow popups.
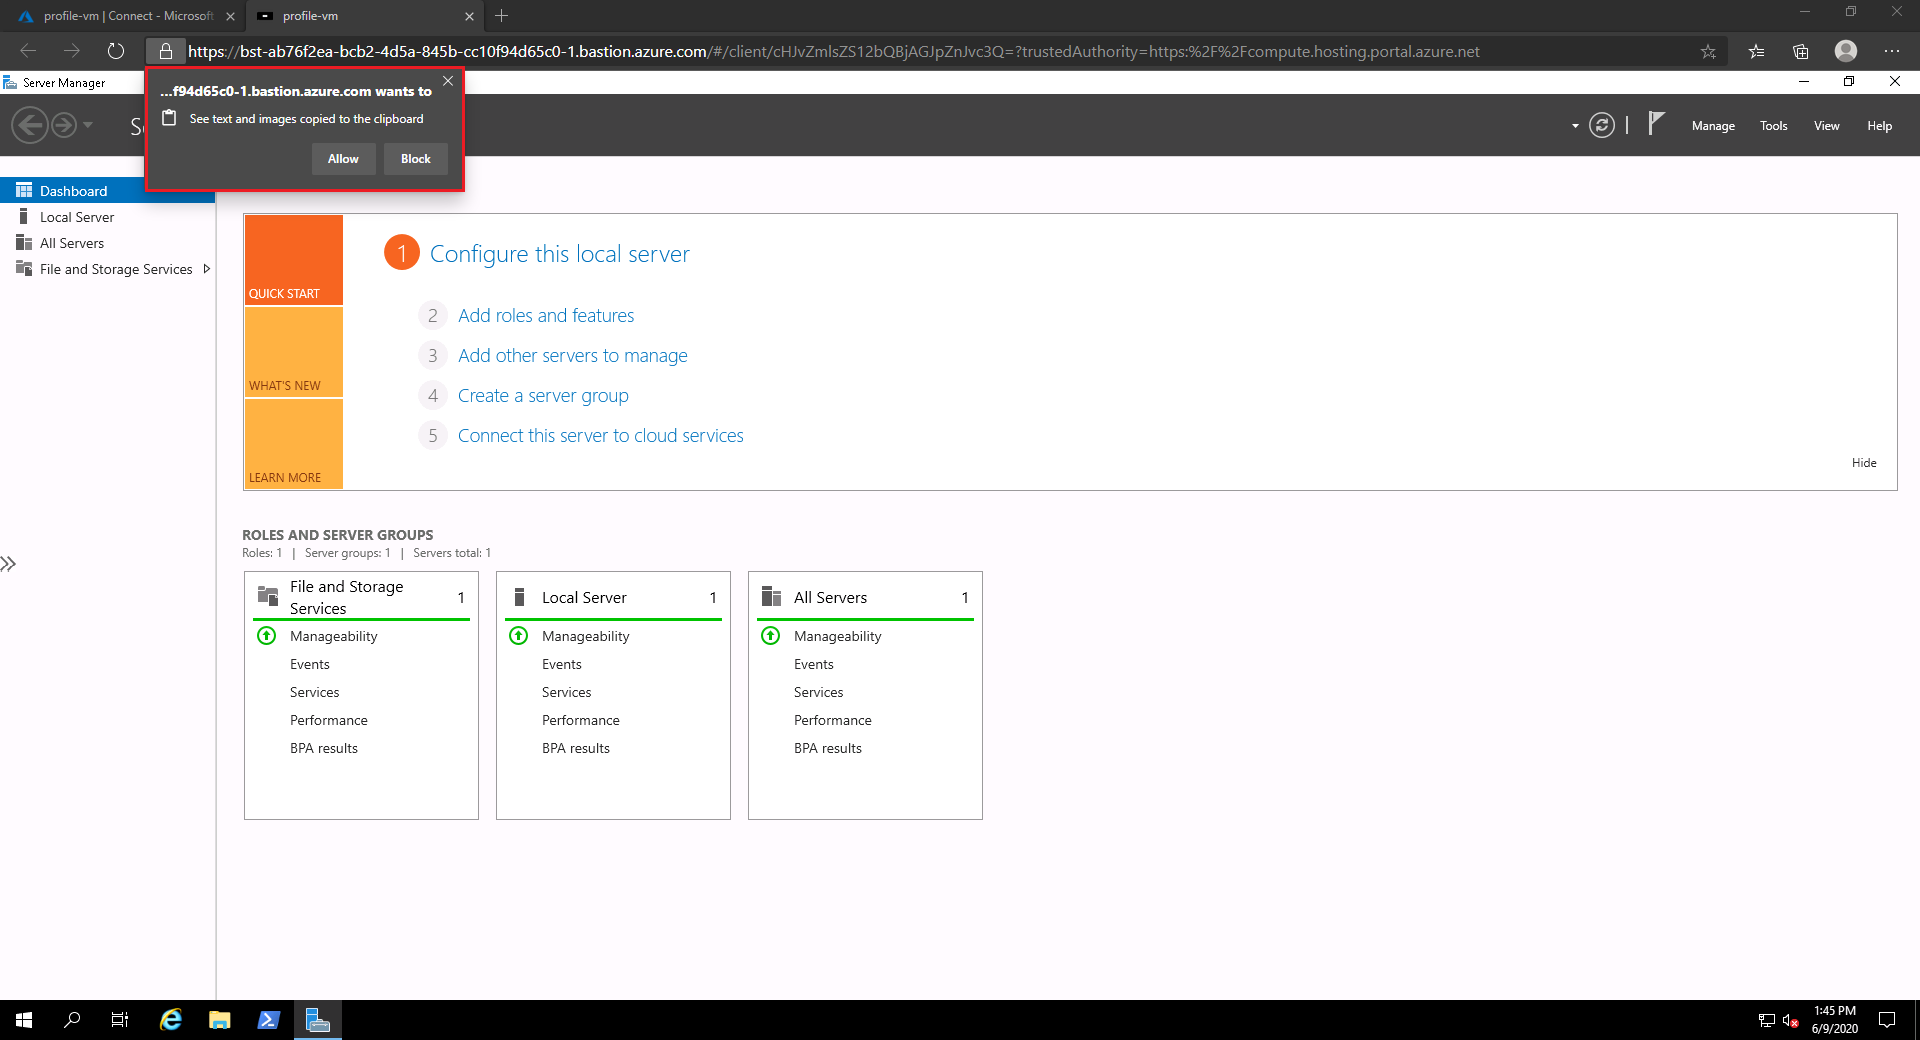
Once connected, you can choose to allow text and imaged to be copied to the clipboard.
Alternatively, clear the checkmark to open the session in a new window…
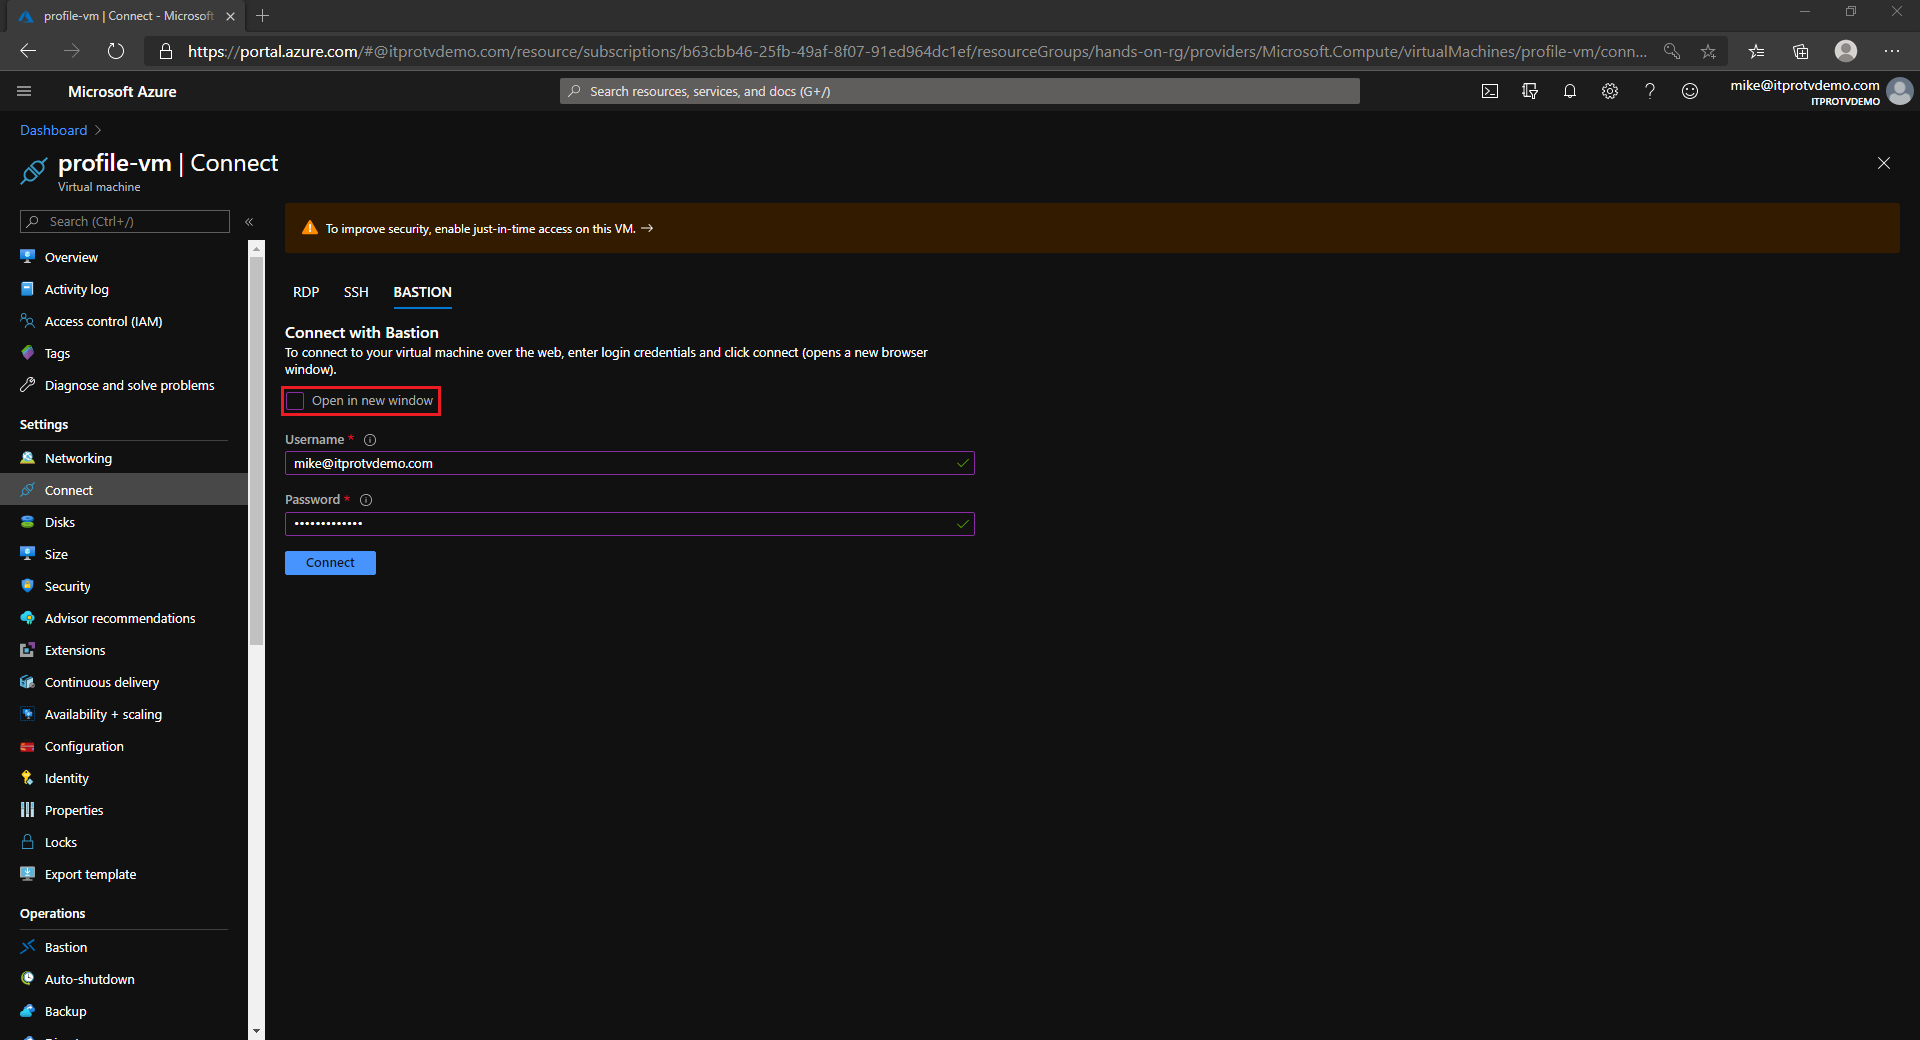
and open the session directly in the Azure portal.
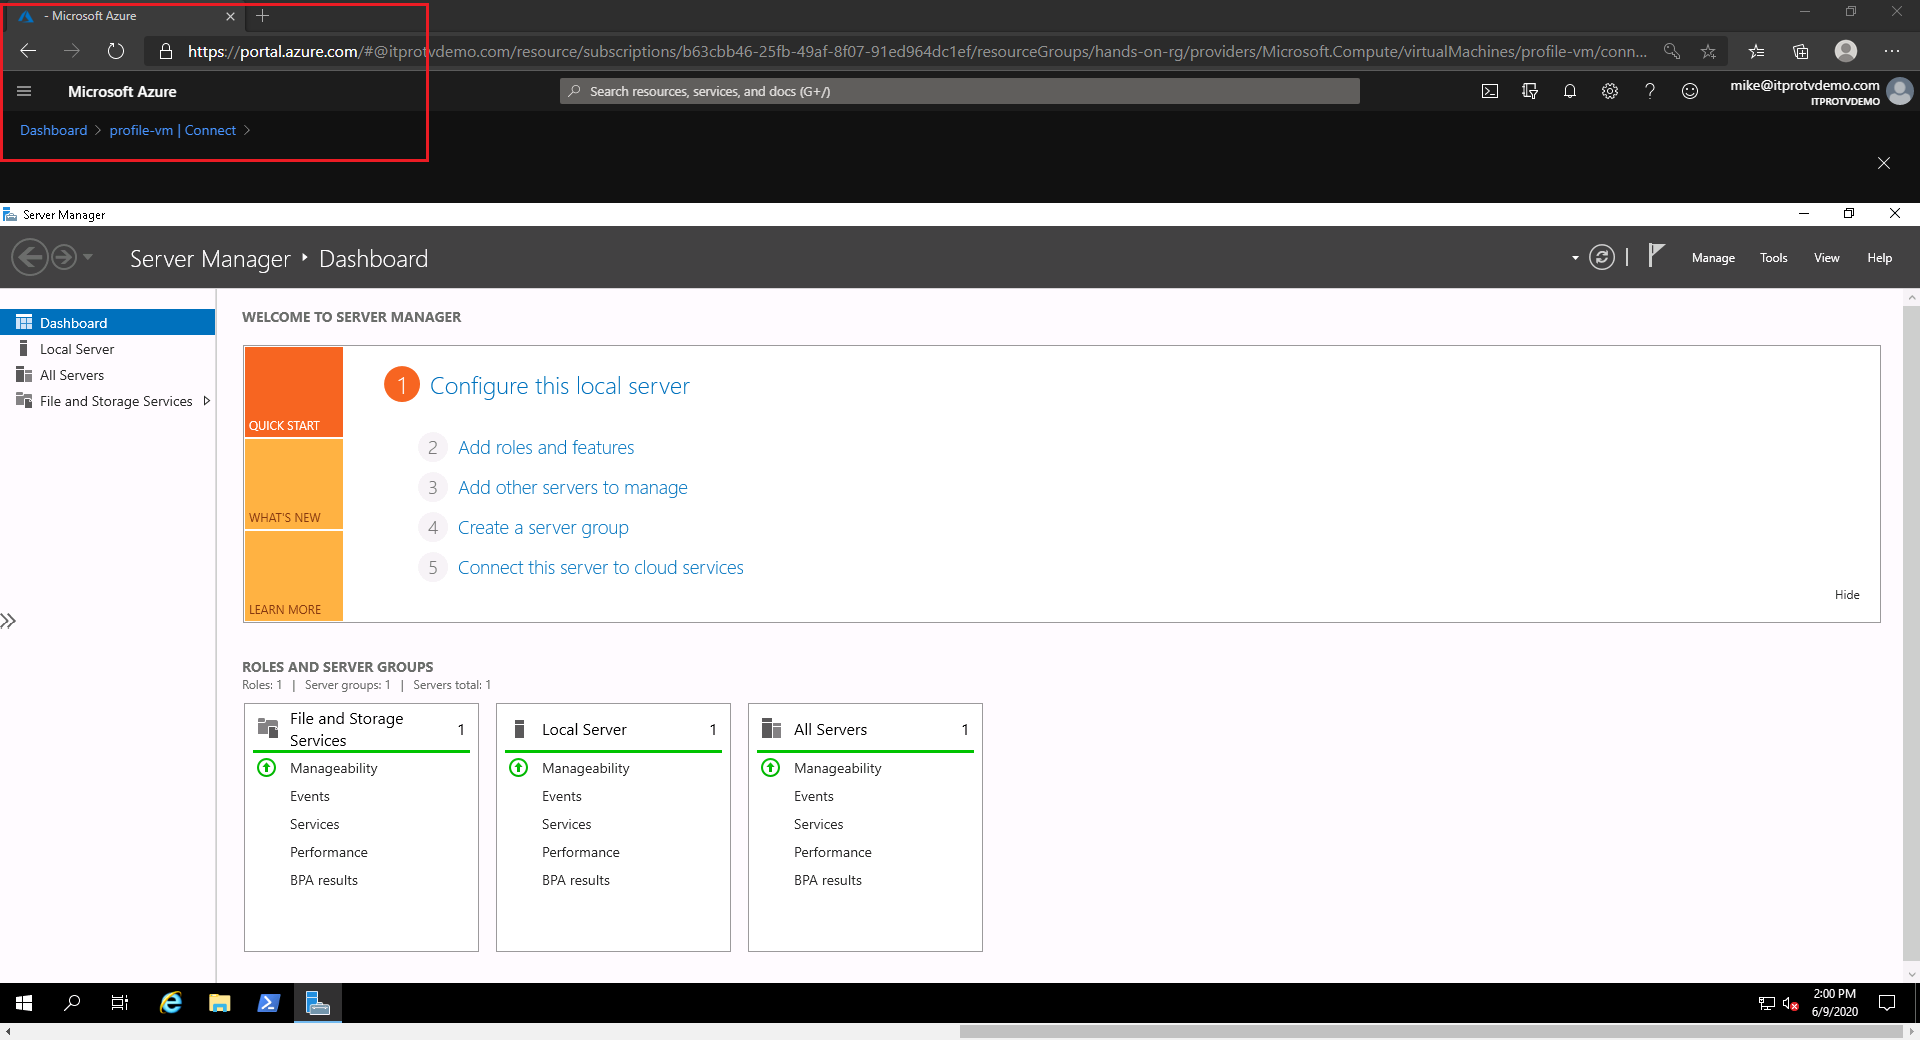
Conclusion
Azure Bastion is a great way to provide secure access to your Azure VMs. It deploys in about 5 minutes and provides VM connectivity directly from the Azure portal. It removes the need for public IP addresses on your Azure VMs, which provides extra security and simplifies NSG management.
Make sure to check out more great articles at ITProTV
Comments are closed